

Mount Pic & Sëurasas: The Quiet Alternative to Seceda
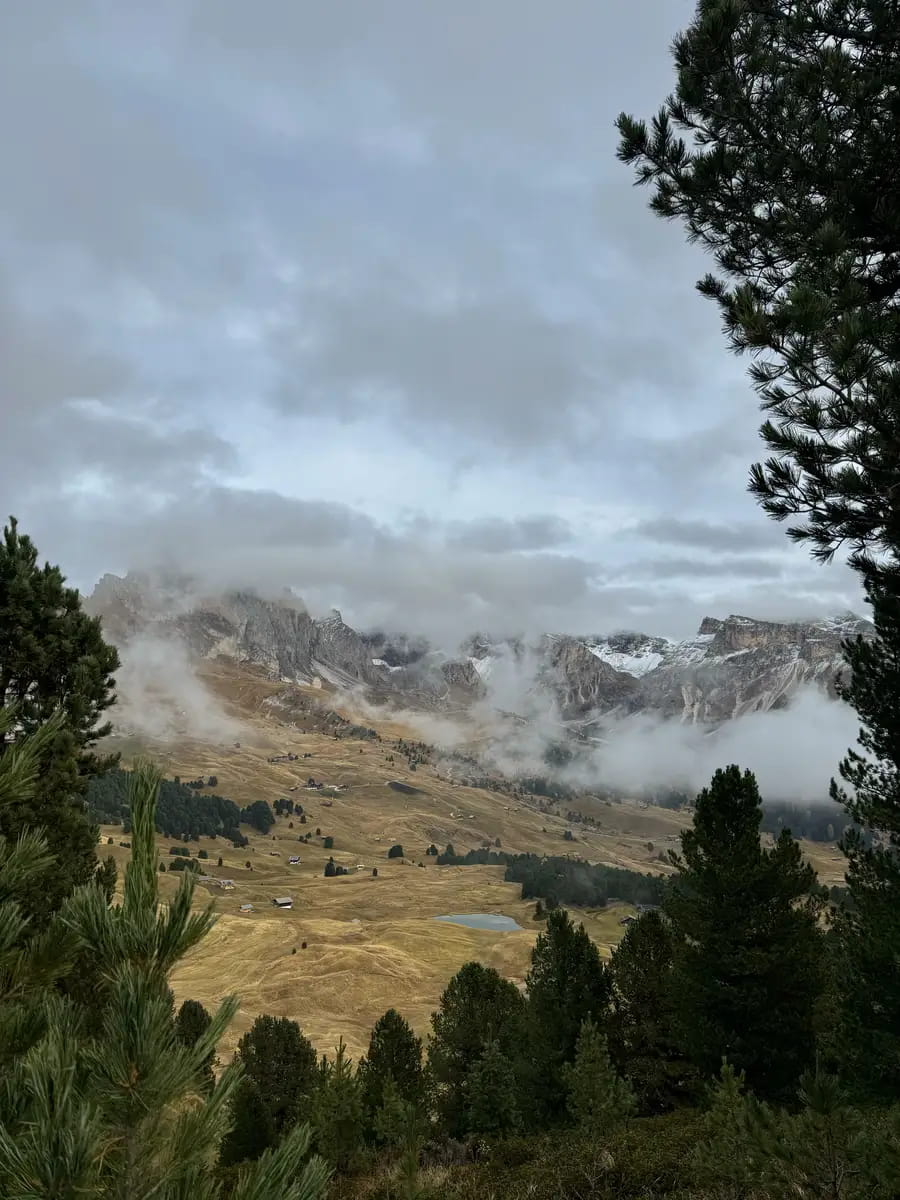
If you find yourself in Val Gardena during the height of summer, or even a crisp October morning, the crowds at Seceda can be a bit much. For a quieter experience with arguably better views of the famous ridgeline, head for Mount Pic.
Mount Pic Hiking Stats: The Breakdown
To give you a clear idea of what to expect before you lace up your boots, here is the quick breakdown of our hike.
Total Distance: 11km loop.
Total Ascent: 721m.
Difficulty: Moderate (due to steep sections). In October, it was very muddy, bring proper hiking boots and hiking poles. Bring a spare change of shoes for the car / bus back.
The Logistics: Parking At Cristauta
This trail starts from the Cristauta (Praplan) car park, which is the same starting point as the standard Seceda hike. It is a small car park. In July or August, you will want to be there well before 8:00 AM to secure a spot.
During the peak season, it is €8 per day ONLY CASH. If you are visiting in October like we did, you might find it is actually free, which is always a nice bonus.
The Ascent: Navigating Trails 4 And 20 To Sëurasas
The trail begins directly from the car park. You start with a steep forest trail that goes uphill for about 20 to 30 minutes. It eventually leads you onto a main path.
Once you hit the path, turn left onto Trail 4. Follow this until you reach a water fountain, then take a right turn along Trail 20. From there, it is another steady uphill climb to reach the Sëurasas mountain hut.
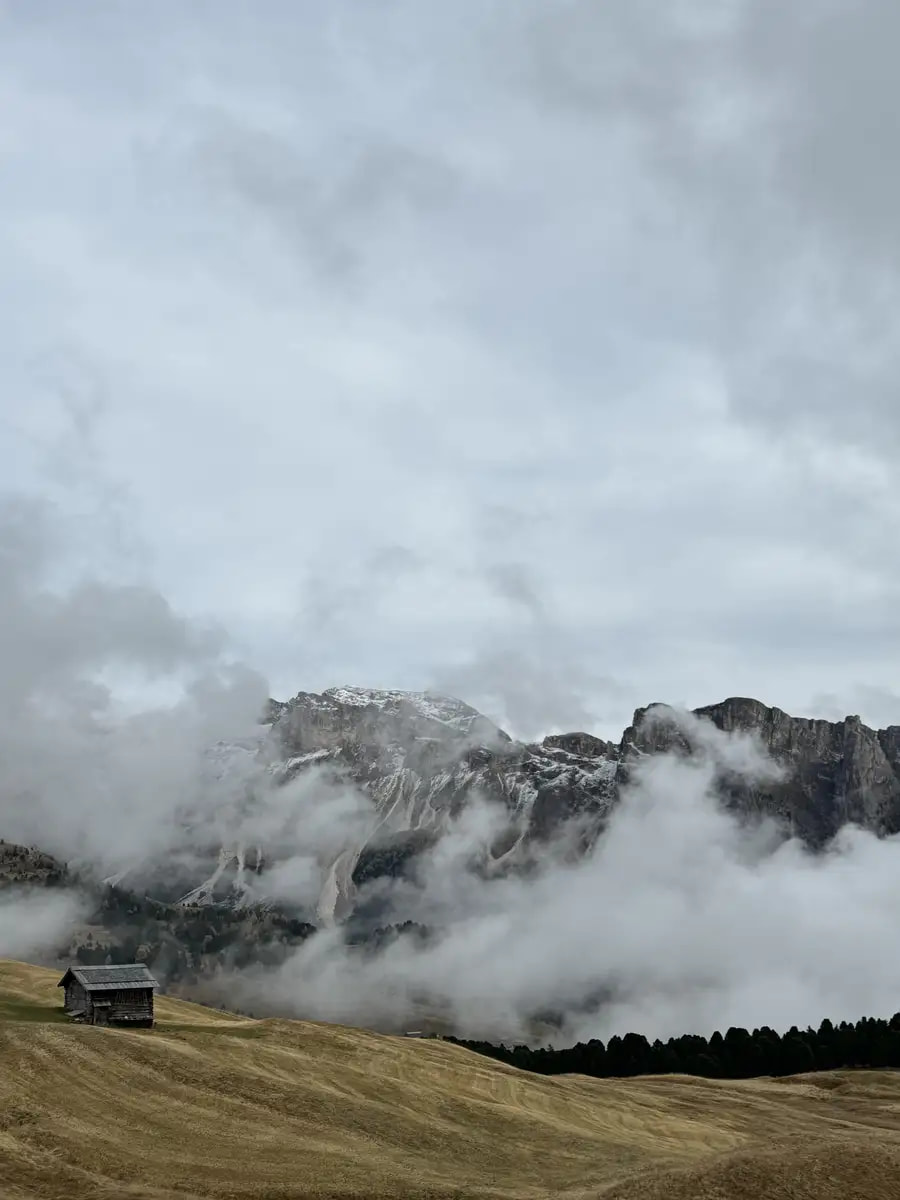
When we visited in October, the hut was closed and the day was quite cloudy, so we missed the panoramic views at first. However, when the clouds did clear, we were treated to a view of the magnificent Sassolungo mountain sitting right across the valley from us. This would be a lovely place to stop and have your lunch, especially with that view right in front of you. However, we had our hearts set on the summit, so we decided to save our picnic for the very top of Mount Pic.
A Worthwhile Detour: The Sëurasas Cross Viewpoint
Once you reach the area around the Sëurasas hut, there is one extra stop you really should make before you push on for the summit. Look for the path leading out towards the Sëurasas cross. It is an incredible viewpoint that sits right on the edge of the plateau and offers a completely different viewpoint of the surrounding peaks.
You follow the path out to the cross for the views, and then you have to walk back the same way you came to get back onto the main trail for Mount Pic. It only adds a few minutes to your total time, but it’s worth it.
Climbing Mount Pic: Mud, Edges, And Paninis
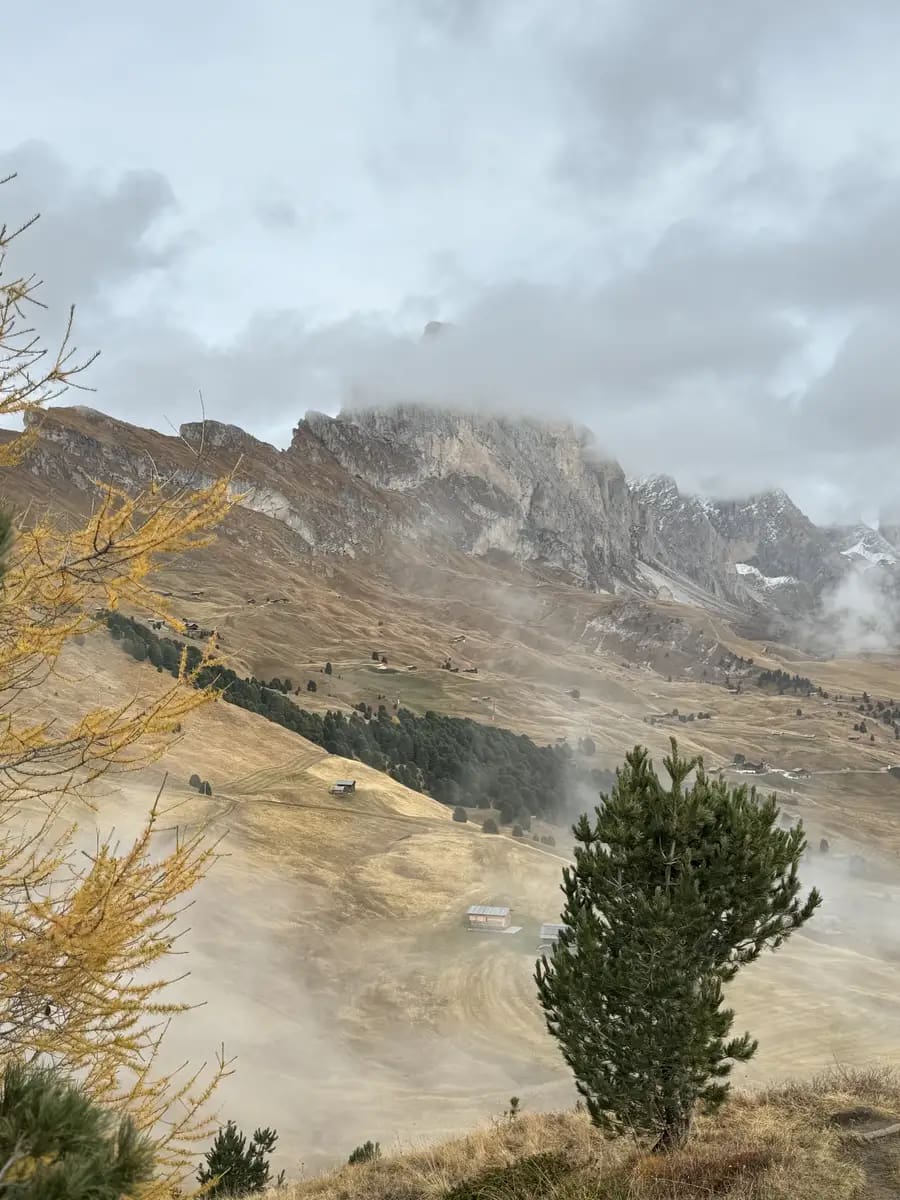
From Sëurasas mountain hut trail, follow signs for Mount Pic. This is where the path starts to get quite interesting. On our day, it was incredibly slippery and muddy. I was actually quite happy for the cloud cover at this point because the trail has some very steep sections and exposed edges. I think I would have panicked a little bit if I could see exactly how high up we were!
When you reach the top of Mount Pic, there is a bench right at the summit. On a clear day, you would have an unbeatable view of the Val Gardena mountains. We sat on the bench to have our paninis and snacks, and as the wind blew the clouds we were blessed with some magnificent views.
The Descent: The Loop Back by Seceda
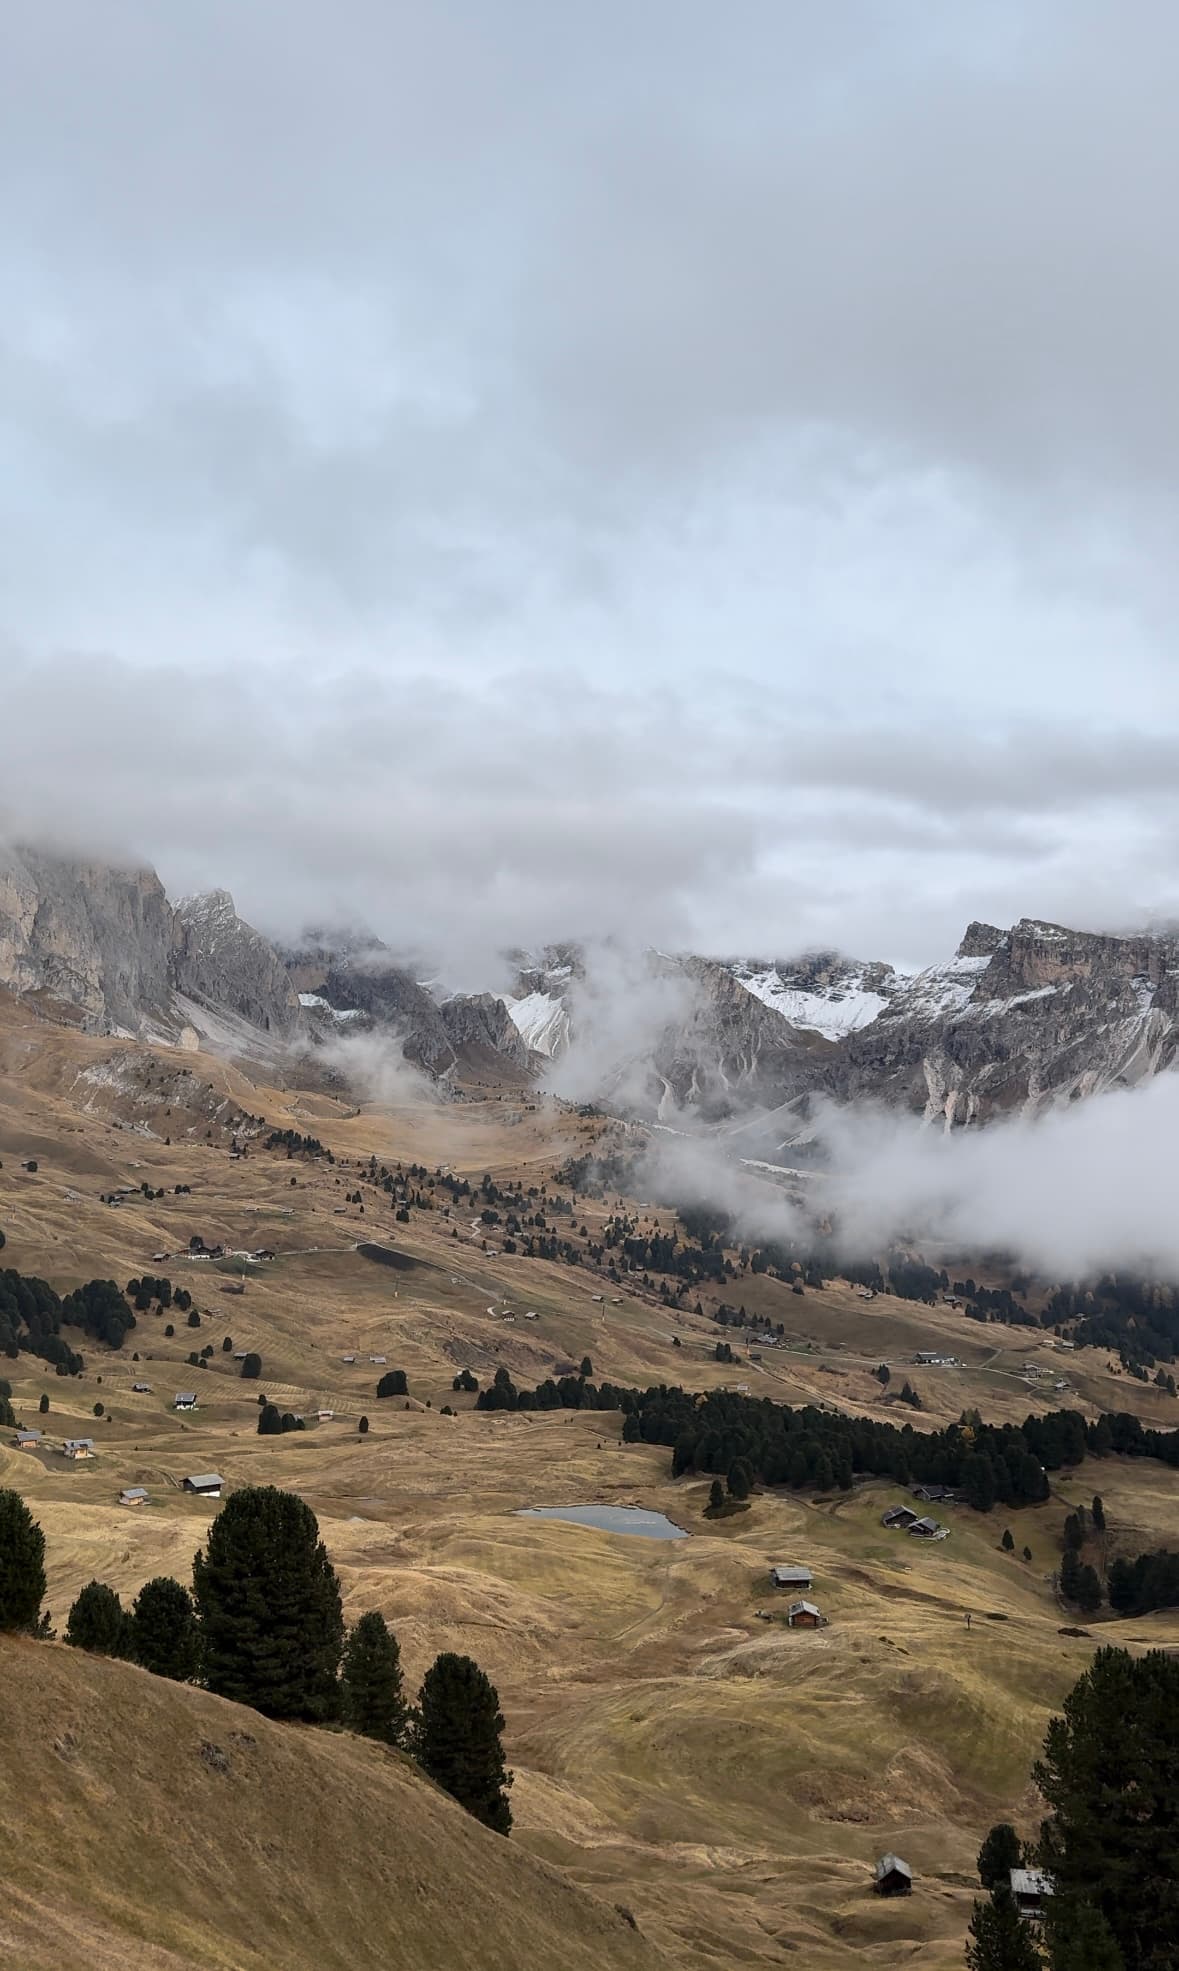
For the return journey, take the northern side of the mountain. You will come out onto the meadows of Mastlè and Seceda, and the views here are breathtaking. You are seeing the valley from the exact opposite angle of the standard Seceda hike, which gives you a whole new appreciation for the landscape. We were the only people doing this trail that day, it was incredibly quiet. I can imagine, even in peak season, this would be a much more peaceful route.
Be warned that this section can stay very muddy. Our hiking boots and trousers were absolutely destroyed by the time we finished. We were lucky to be wearing our Geotek hiking boots, as good waterproof gear is a necessity here rather than a suggestion. Since we had already done the main Seceda ridgeline, we did not take the trail back up there. Instead, we followed the signs for Col Raiser and completed the loop back to the car park.
After you leave the Col Raiser area, you need to head downhill. Look for the signs pointing towards Cristauta or S. Cristina (Praplan). You will primarily be following Trail 4, which is a wide and well-beaten path that makes for a very easy descent.
As you walk down, you will pass the Gamsblut Hut. This is a great landmark to keep an eye on because it confirms you are on the right track. From the hut, you just keep following the signs for the car park. It is a steady, gentle walk that brings you right back to where you started at the beginning of the day.

In My Rucksack: Packing for the Peaks
October in the Dolomites is a mixture of all four seasons. One minute it’s breezy and cold and the next you are warm in the sun. I highly recommend “The Onion Method” which is lots of thin, high-quality layers that you can peel off or pile on as the weather shifts.
The Layering System: I wore body warmers from both UNICLO and Primark.
For my fleece, I used [The North Face Denali Jacket]. It’s a classic for a reason, it’s properly warm without being too bulky to fit under a shell. I went for the Chlorophyll Green which looked fantastic against the autumn colours, but more importantly, it kept me warm at the summits.
Your top layer needs to be a shield. I used [The North Face Diablo Dynamic Jacket]. It’s a solid, reliable rain jacket that is completely windproof and waterproof. It’s lightweight enough to shove into your pack when the sun comes out, but heavy-duty enough to handle a proper mountain downpour.
Sturdy Hiking Boots: You need something waterproof with a good grip. The trails on Seceda, Mount Pic and Adolf Munkel are slippery, especially if there’s a bit of morning frost or loose scree. I’ve been wearing [The North Face Verto GORE-TEX Alpine Mid Boots] and they have been a game-changer. They have a Vibram sole which is fantastic for gripping and the Gore-Tex lining is a lifesaver when you inevitably end up crossing muck and snow.
The Break-in Tip: If you’re getting a fresh pair for your trip, wear thick socks for that first outing and keep a few Compeed plasters in your bag just in case. Mine needed that initial hike to soften up, but once they were worn in, they were very comfortable. Now, I can spend all day in them without a second thought.
The Accessories: Bring gloves, a warm hat (beanie), and sunglasses. Even on a blue-sky day, the wind at the ridgelines is sharp. The high-altitude glare is also incredibly strong, so your eyes will thank you for the protection.
☀️ The Summer Switch: Visiting in June or July? Swap the heavy down jacket for a light windbreaker and ensure you pack high-factor SPF—the mountain sun is deceivingly strong in the summer months.